


The content below is taken from the original ( Creating and deploying a model with Azure Machine Learning Service), to continue reading please visit the site. Remember to respect the Author & Copyright.
In this post, we will take a look at creating a simple machine learning model for text classification and deploying it as a container with Azure Machine Learning service. This post is not intended to discuss the finer details of creating a text classification model. In fact, we will use the Keras library and its Reuters newswire dataset to create a simple dense neural network. You can find many online examples based on this dataset. For further information, be sure to check out and buy  Deep Learning with Python by François Chollet, the creator of Keras and now at Google. It contains a section that explains using this dataset in much more detail!
Machine Learning service workspace
To get started, you need an Azure subscription. Once you have the subscription, create a Machine Learning service workspace. Below, you see such a workspace:

Together with the workspace, you also get a storage account, a key vault, application insights and a container registry. In later steps, we will create a container and store it in this registry. That all happens behind the scenes though. You will just write a few simple lines of code to make that happen!
Note the Authoring (Preview) section! These were added just before Build 2019 started. For now, we will not use them.
Azure Notebooks
To create the model and interact with the workspace, we will use a free Jupyter notebook in Azure Notebooks. At this point in time (8 May 2019), Azure Notebooks is still in preview. To get started, find the link below in the Overview section of the Machine Learning service workspace:

To quickly get the notebook, you can clone my public project:  https://notebooks.azure.com/geba/projects/textclassificationblog.
Creating the model
When you open the notebook, you will see the following first four cells:

It’s always simple if a prepared dataset is handed to you like in the above example. Above, you simply use the reuters class of keras.datasets and use the load_data method to get the data and directly assign it to variables to hold the train and test data plus labels.
In this case, the data consists of newswires with a corresponding label that indicates the category of the newswire (e.g. an earnings call newswire). There are 46 categories in this dataset. In the real world, you would have the newswire in text format. In this case, the newswire has already been converted (preprocessed) for you in an array of integers, with each integer corresponding to a word in a dictionary.
A bit further in the notebook, you will find a Vectorization section:
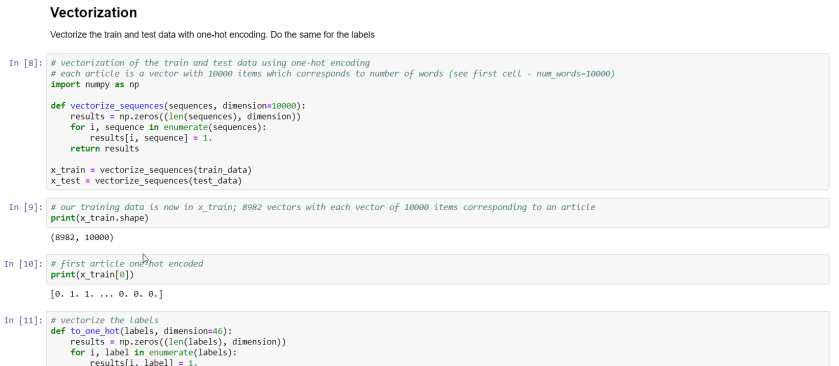
In this section, the train and test data is vectorized using a one-hot encoding method. Because we specified, in the very first cell of the notebook, to only use the 10000 most important words each article can be converted to a vector with 10000 values. Each value is either 1 or 0, indicating the word is in the text or not.
This bag-of-words approach is one of the ways to represent text in a data structure that can be used in a machine learning model. Besides vectorizing the training and test samples, the categories are also one-hot encoded.
Now the dense neural network model can be created:
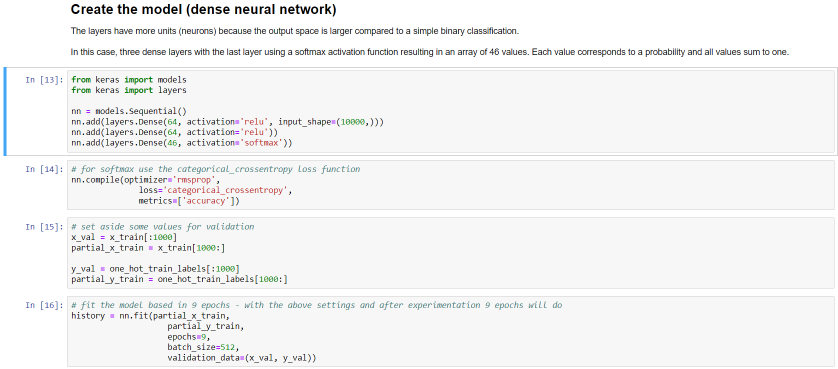
The above code defines a very simple dense neural network. A dense neural network is not necessarily the best type but that’s ok for this post. The specifics are not that important. Just note that the nn variable is our model. We will use this variable later when we convert the model to the ONNX format.
The last cell (16 above) does the actual training in 9 epochs. Training will be fast because the dataset is relatively small and the neural network is simple. Using the Azure Notebooks compute is sufficient. After 9 epochs, this is the result:
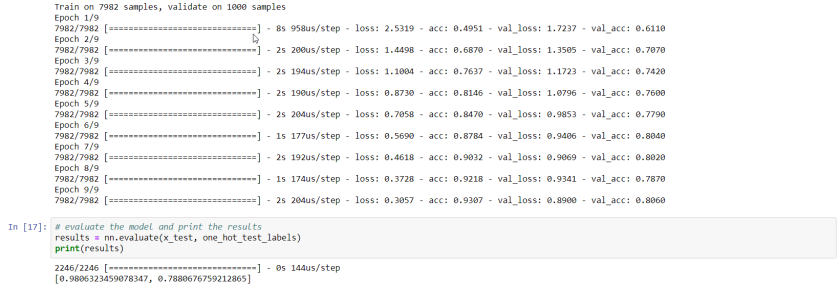
Not exactly earth-shattering: 78% accuracy on the test set!
Saving the model in ONNX format
ONNX is an open format to store deep learning models. When your model is in that format, you can use the ONNX runtime for inference.
Converting the Keras model to ONNX is easy with the onnxmltools:

The result of the above code is a file called reuters.onnx in your notebook project.
Predict with the ONNX model
Let’s try to predict the category of the first newswire in the test set. Its real label is 3, which means it’s a newswire about an earnings call (earn class):
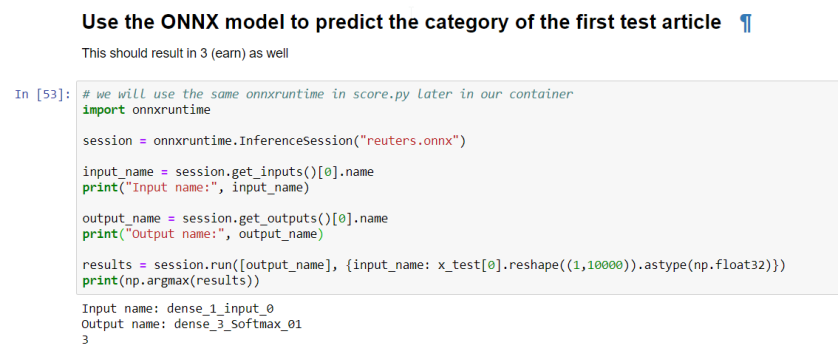
We will use similar code later in score.py, a file that will be used in a container we will create to expose the model as an API. The code is pretty simple: start an inference session based on the reuters.onnx file, grab the input and output and use run to predict. The resulting array is the output of the softmax layer and we use argmax to extract the category with the highest probability.
Saving the model to the workspace
With the model in reuters.onnx, we can add it to the workspace:
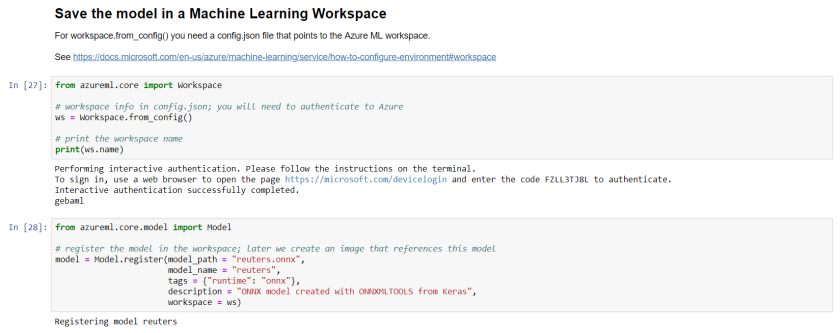
You will need a file in your Azure Notebook project called config.json with the following contents:
{
     "subscription_id": "<subscription-id>",
     "resource_group": "<resource-group>",
     "workspace_name": "<workspace-name>"
}
With that file in place, when you run cell 27 (see above), you will need to authenticate to Azure to be able to interact with the workspace. The code is pretty self-explanatory: the reuters.onnx model will be added to the workspace:
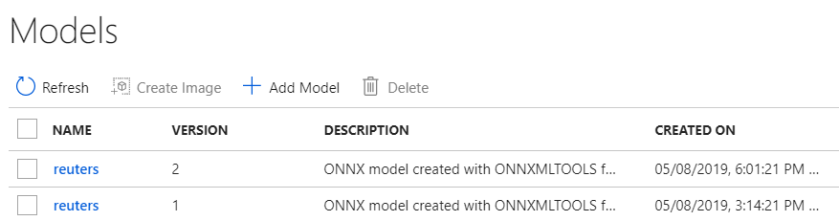
As you can see, you can save multiple versions of the model. This happens automatically when you save a model with the same name.
Creating the scoring container image
The scoring (or inference) container image is used to expose an API to predict categories of newswires. Obviously, you will need to give some instructions how scoring needs to be done. This is done via score.py:
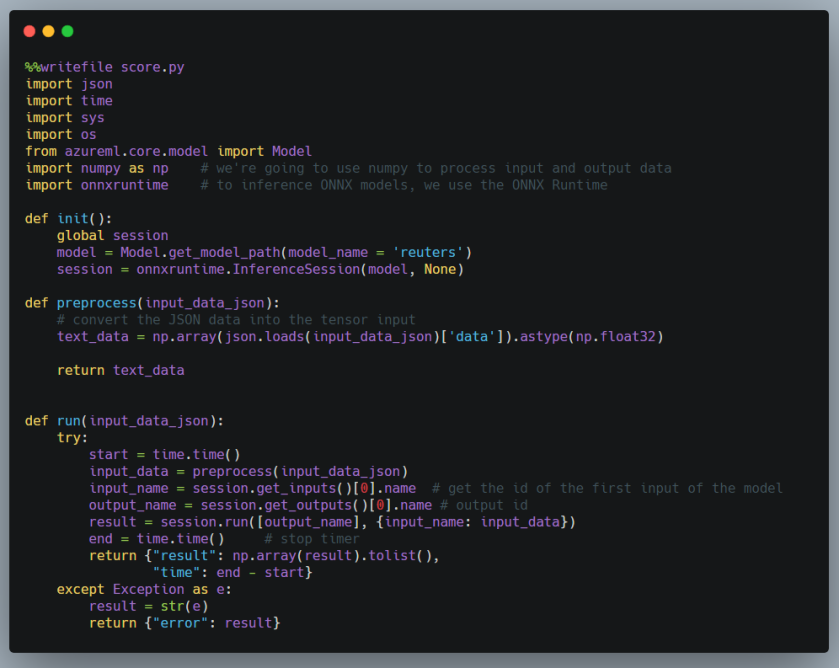
The code is similar to the code we wrote earlier to test the ONNX model. score.py needs an init() and run() function. The other functions are helper functions. In init(), we need to grab a reference to the ONNX model. The ONNX model file will be placed in the container during the build process. Next, we start an InferenceSession via the ONNX runtime. In run(), the code is similar to our earlier example. It predicts via session.run and returns the result as JSON. We do not have to worry about the rest of the code that runs the API. That is handled by Machine Learning service.
Note: using ONNX is not a requirement; we could have persisted and used the native Keras model for instance
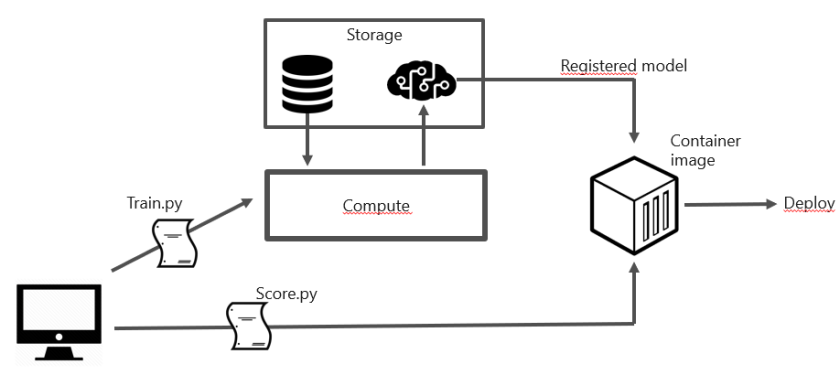
In this post, we only need score.py since we do not train our model via Azure Machine learning service. If you train a model with the service, you would create a train.py file to instruct how training should be done based on data in a storage account for instance. You would also provision compute resources for training. In our case, that is not required so we train, save and export the model directly from the notebook.
Now we need to create an environment file to indicate the required Python packages and start the image build process:

The build process is handled by the service and makes sure the model file is in the container, in addition to score.py and myenv.yml. The result is a fully functional container that exposes an API that takes an input (a newswire) and outputs an array of probabilities. Of course, it is up to you to define what the input and output should be. In this case, you are expected to provide a one-hot encoded article as input.
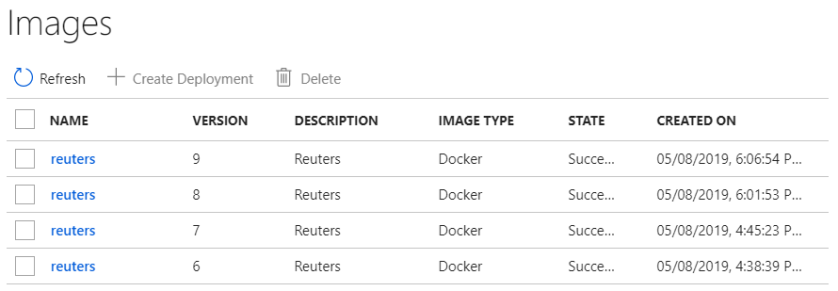
The container image will be listed in the workspace, potentially multiple versions of it:
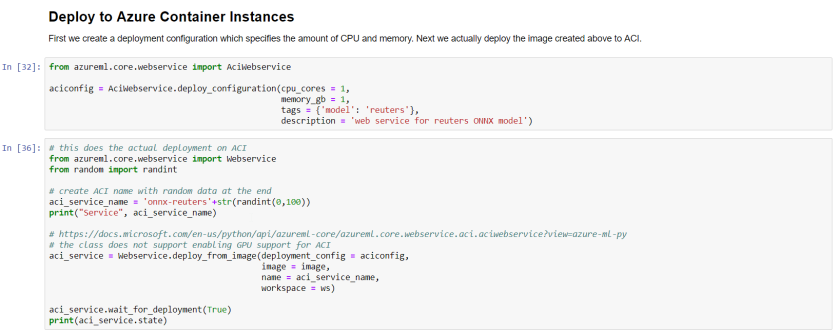
Deploy to Azure Container Instances
When the image is ready, you can deploy it via the Machine Learning service to Azure Container Instances (ACI) or Azure Kubernetes Service (AKS). To deploy to ACI:
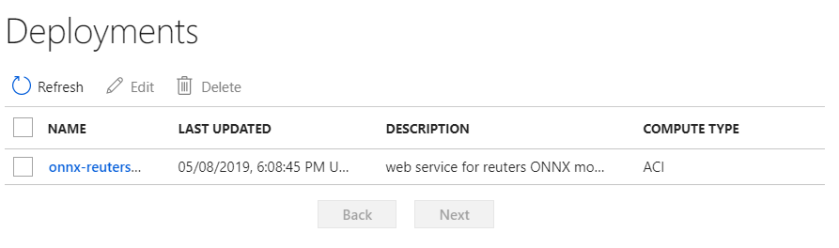
When the deployment is finished, the deployment will be listed:
When you click on the deployment, the scoring URI will be shown (e.g. http://IPADDRESS:80/score). You can now use Postman or any other method to score an article. To quickly test the service from the notebook:

The helper method run of aci_service will post the JSON in test_sample to the service. It knows the scoring URI from the deployment earlier.
Conclusion
Containerizing a machine learning model and exposing it as an API is made surprisingly simple with Azure Machine learning service. It saves time so you can focus on the hard work of creating a model that performs well in the field. In this post, we used a sample dataset and a simple dense neural network to illustrate how you can build such a model, convert it to ONNX format and use the ONNX runtime for scoring.
