The content below is taken from the original ( Create a Discord Webhook with Python for Your Bot), to continue reading please visit the site. Remember to respect the Author & Copyright.
Discord is an IRC-like chat platform that all the young cool kids are hanging out on. Originally intended as a way to communicate during online games, Discord has grown to the point that there are servers out there for nearly any topic imaginable. One of the reasons for this phenomenal growth is how easy it is to create and moderate your own Discord server: just hit the “+” icon on the website or in the mobile application, and away you go.
As a long-time IRC guy, I was initially unimpressed with Discord. It seemed like the same kind of stuff we’ve had for decades, but with an admittedly slick UI. After having used it for a few months now and joining servers dedicated to everything from gaming to rocket science, I can’t say that my initial impression of Discord is inaccurate: it’s definitely just a modern IRC. But I’ve also come to the realization that I’m OK with that.
But this isn’t a review of Discord or an invitation to join the server I’ve setup for my Battlefield platoon. In this article we’re going to look at how easy it is to create a simple “bot” that you can plug into a Discord server and do useful work with. Since anyone can create a persistent Discord server for free, it’s an interesting platform to use for IoT monitoring and logging by simply sending messages into the server.
A Practical Example
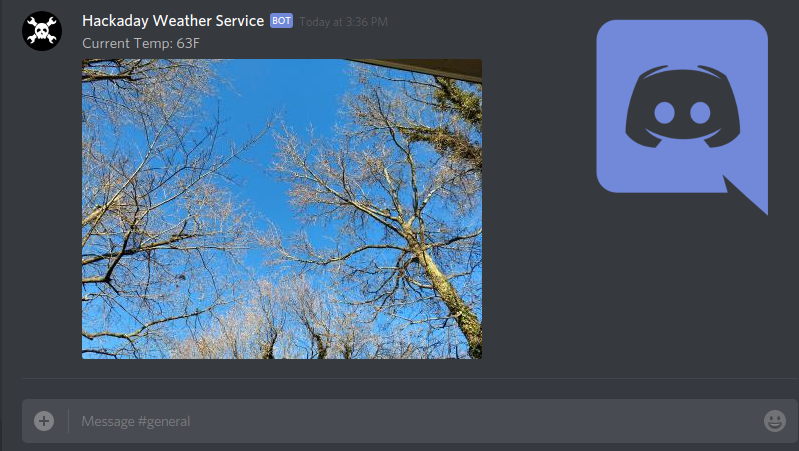
I don’t want to get too bogged down with the specifics of how you can use Discord in your project, I leave that up to the reader’s imagination. But as an example, let’s say you wanted to create a weather monitoring station that would post the current temperature and a picture of the sky to your Discord server every hour or so.
Let’s also say that the temperature sensing is happening in the background and is available to our code as the variable CURRENT_TEMP, and that the image "latest_img.jpg" is also automatically popping up in the current directory where our Python script can get to it.
Setting Up the Discord Server
 As mentioned previously, setting up a Discord server is exceptionally easy. All you really have to do is give the thing a name and click “Create”. Incidentally, you should setup the server on your computer via the Discord web interface, as not all of the options mentioned below are currently available from the mobile applications.
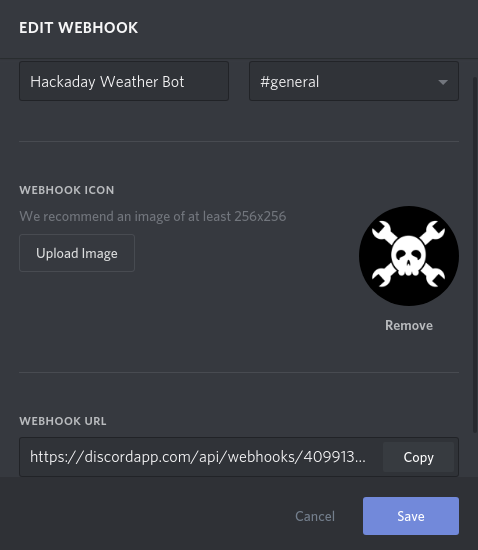
Once you’ve created it, you then need to go into the server settings for webhooks. This is where you will create your webhook entries and get the authentication tokens that your script will need to send messages into the server.
Each webhook needs its own name, and you can give them individual icons to pretty things up a bit. The configuration will also ask you what channel you want the webhook to have access to, which let’s you subdivide things nicely if you plan on having a lot of data get dumped into the server.
The final part of the webhook configuration is the most important, as it gives you the URL the webhook will use. The URL contains the authentication token and ID:
discordapp.com/api/webhooks/WEBHOOK_ID/WEBHOOK_TOKEN
Software Environment
As previously mentioned, I’ll be doing this in Python since that’s also what the cool kids are doing this days. There are Discord libraries available for pretty much any language you can think of though, so if you want to do something similar in your language of choice it shouldn’t be a problem and the server-side setup will still look the same.
The two libraries required are the ever popular Requests, which will handle the HTTP side of things for us, and discord.py which is the most popular Discord API wrapper for Python. Note that we need to use the development version of discord.py for this to work, as the stable build doesn’t currently have webhook support.
The Code
It’s actually quite simple to send a message into the Discord server with these libraries, and a basic implementation only takes a few lines:
#!/usr/bin/env python3
import requests
import discord
from discord import Webhook, RequestsWebhookAdapter, File

# Create webhook
webhook = Webhook.partial(WEBHOOK_ID, WEBHOOK_TOKEN,\
 adapter=RequestsWebhookAdapter())

# Send temperature as text
webhook.send("Current Temp: " + CURRENT_TEMP)

# Upload image to server
webhook.send(file=discord.File("latest_img.jpg"))
That’s all there is to it. Executing that code should send a message into the Discord server from the webhook bot created earlier.
Final Thoughts
Discord has native applications for all major mobile and desktop operating systems, as well as a very polished web interface that you can use from any computer with a modern web browser without having to install anything. This ubiquity and ease-of-use make it an interesting platform for more than just chatting about games. Using Discord for remote monitoring and logging means that you, and anyone you wish to invite, can get instantaneous notifications and updates about anything you want.
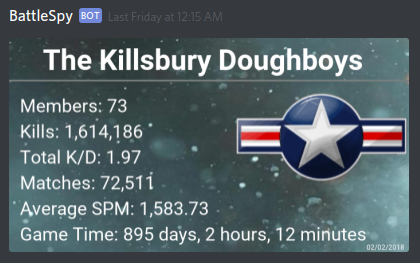
Personally, I’m using a similar setup to post automatically generated stats for my Battlefield platoon directly into our Discord chat every Friday morning with a couple of Python scripts and a cron job running on a Pi Zero. But the only real limit is your imagination.