The content below is taken from the original ( How to use a Chromebook if you’ve switched from a PC), to continue reading please visit the site. Remember to respect the Author & Copyright.
Editor’s note:This is the second post in an ongoing tips series. If your company recently switched to Chrome OS, use these tips to get up to speed. If you’re an IT administrator, pass these tips along to your users to help them stay productive.
Last month, we shared tips on how to use a Chromebook if you switched from previously using a Mac. This month, we’ll explore similar topics for PC users, answering questions about keyboard shortcuts and finding files. If you’ve recently switched from using a PC with a Windows operating system to a Chromebook with Chrome OS, here are four must-read tips to help you get started.
1. How do I locate my apps and files?
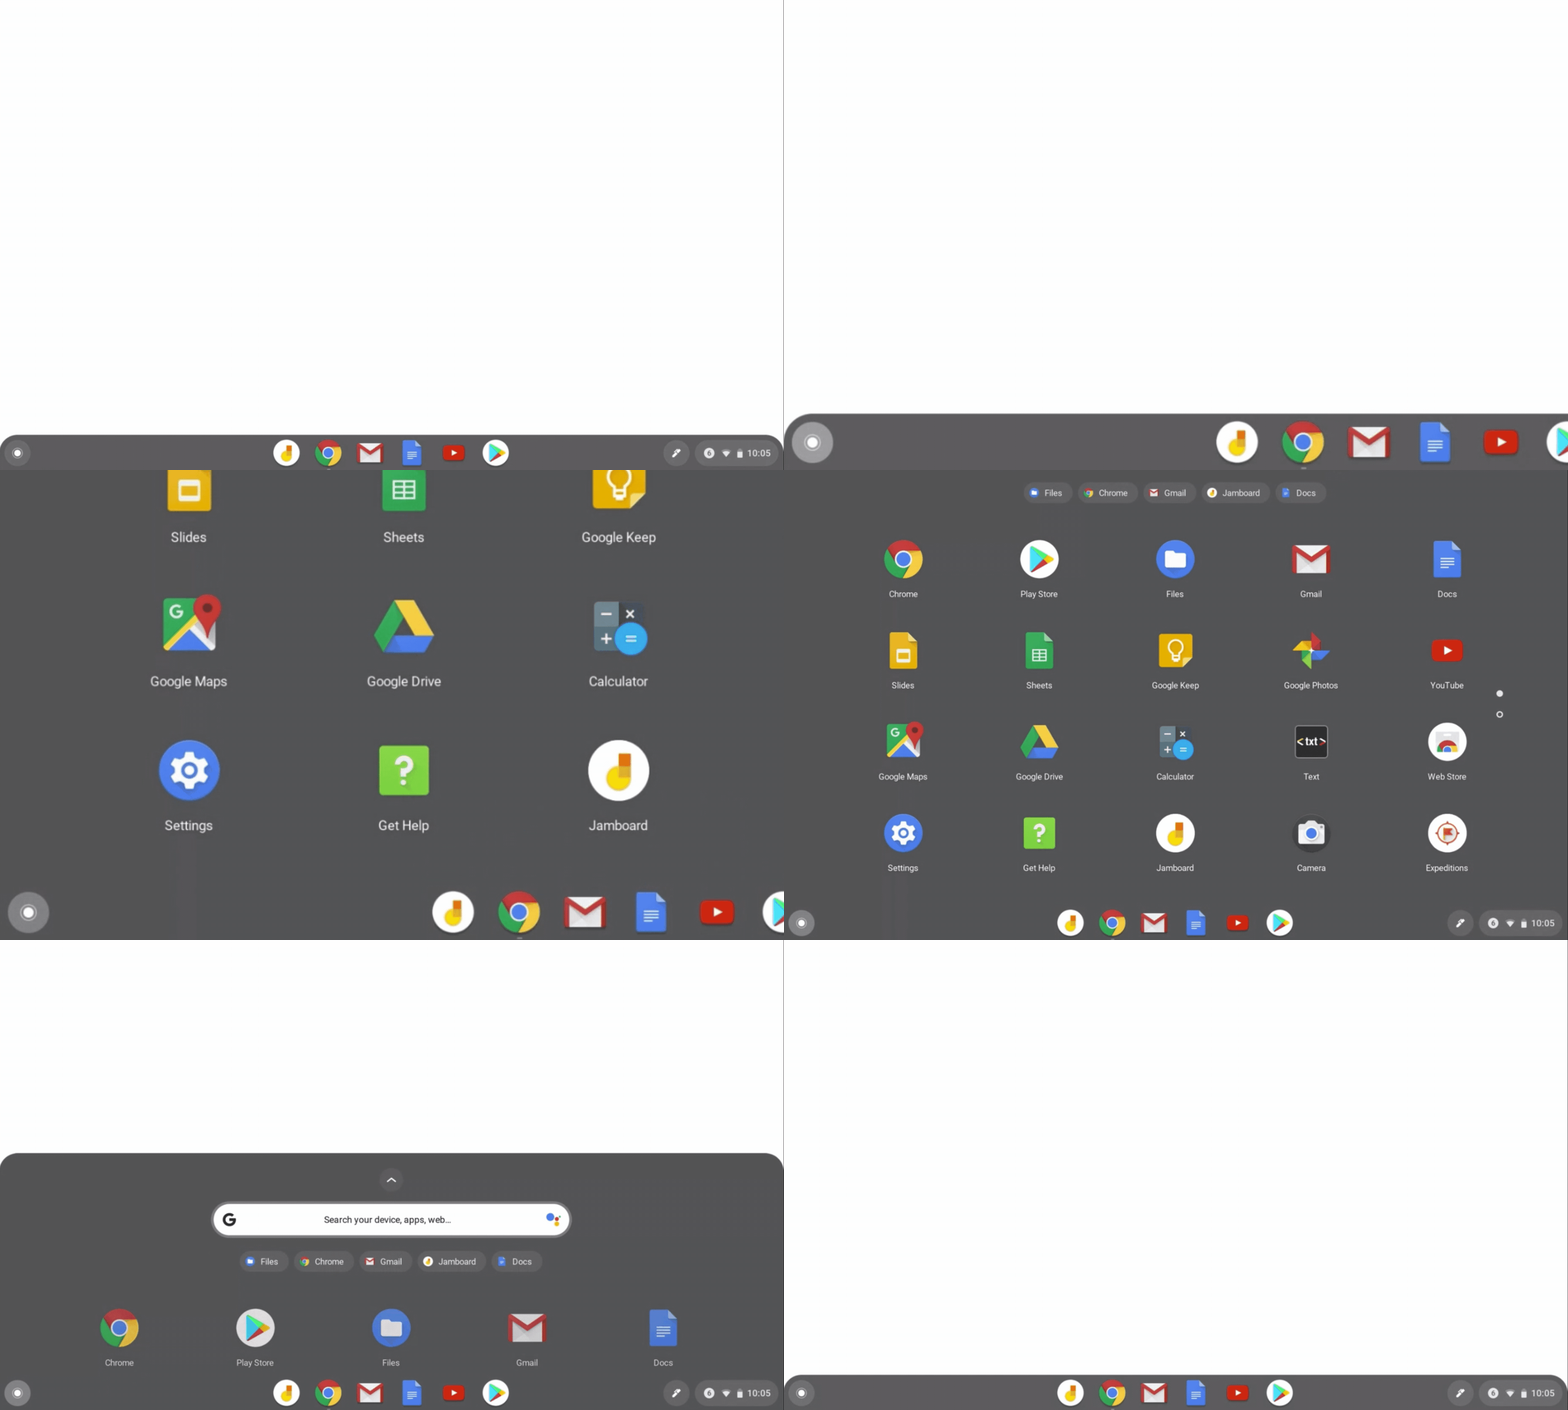
You’re probably used to accessing files and apps via the Start Menu on the bottom left-hand side of your PC. On a Chromebook, you access files and apps from the Launcher, which is the button that looks like a circle with a dot in the bottom of your screen.

Here’s how to use the Launcher:
If you don’t have a touchscreen, click anywhere on the Launcher button. If you have a touchscreen, drag your finger up from the bottom part of your screen (we call this the “app shelf”). The Launcher will pop up—this is where you can access all of your apps, including Gmail, Google Drive, Docs, Sheets and Slides, as well as YouTube.
If you need to find a specific app, document or file, you can search in the search bar at the top of Launcher. Using predictive text based on machine learning, Google Search helps you find what you need quickly, whether it’s tracking down an app to use, searching the web, or finding a specific Doc you created.
2. How do I take a screenshot?
If you want to take a screenshot of your entire screen on a Chromebook, press Ctrl + the Show windows button (Ctrl + F5). To capture a partial screenshot, press Shift + Ctrl + Show windows (Shift + Ctrl + F5), then click and drag your cursor over the exact area you want to capture. To take a screenshot on tablets, press the Power button + the Volume down button at the same time.

While we’re on the topic, there are loads of ways to work more efficiently with keyboard shortcuts. Check out our Help Center for other shortcut ideas.
3. How do I change my settings?
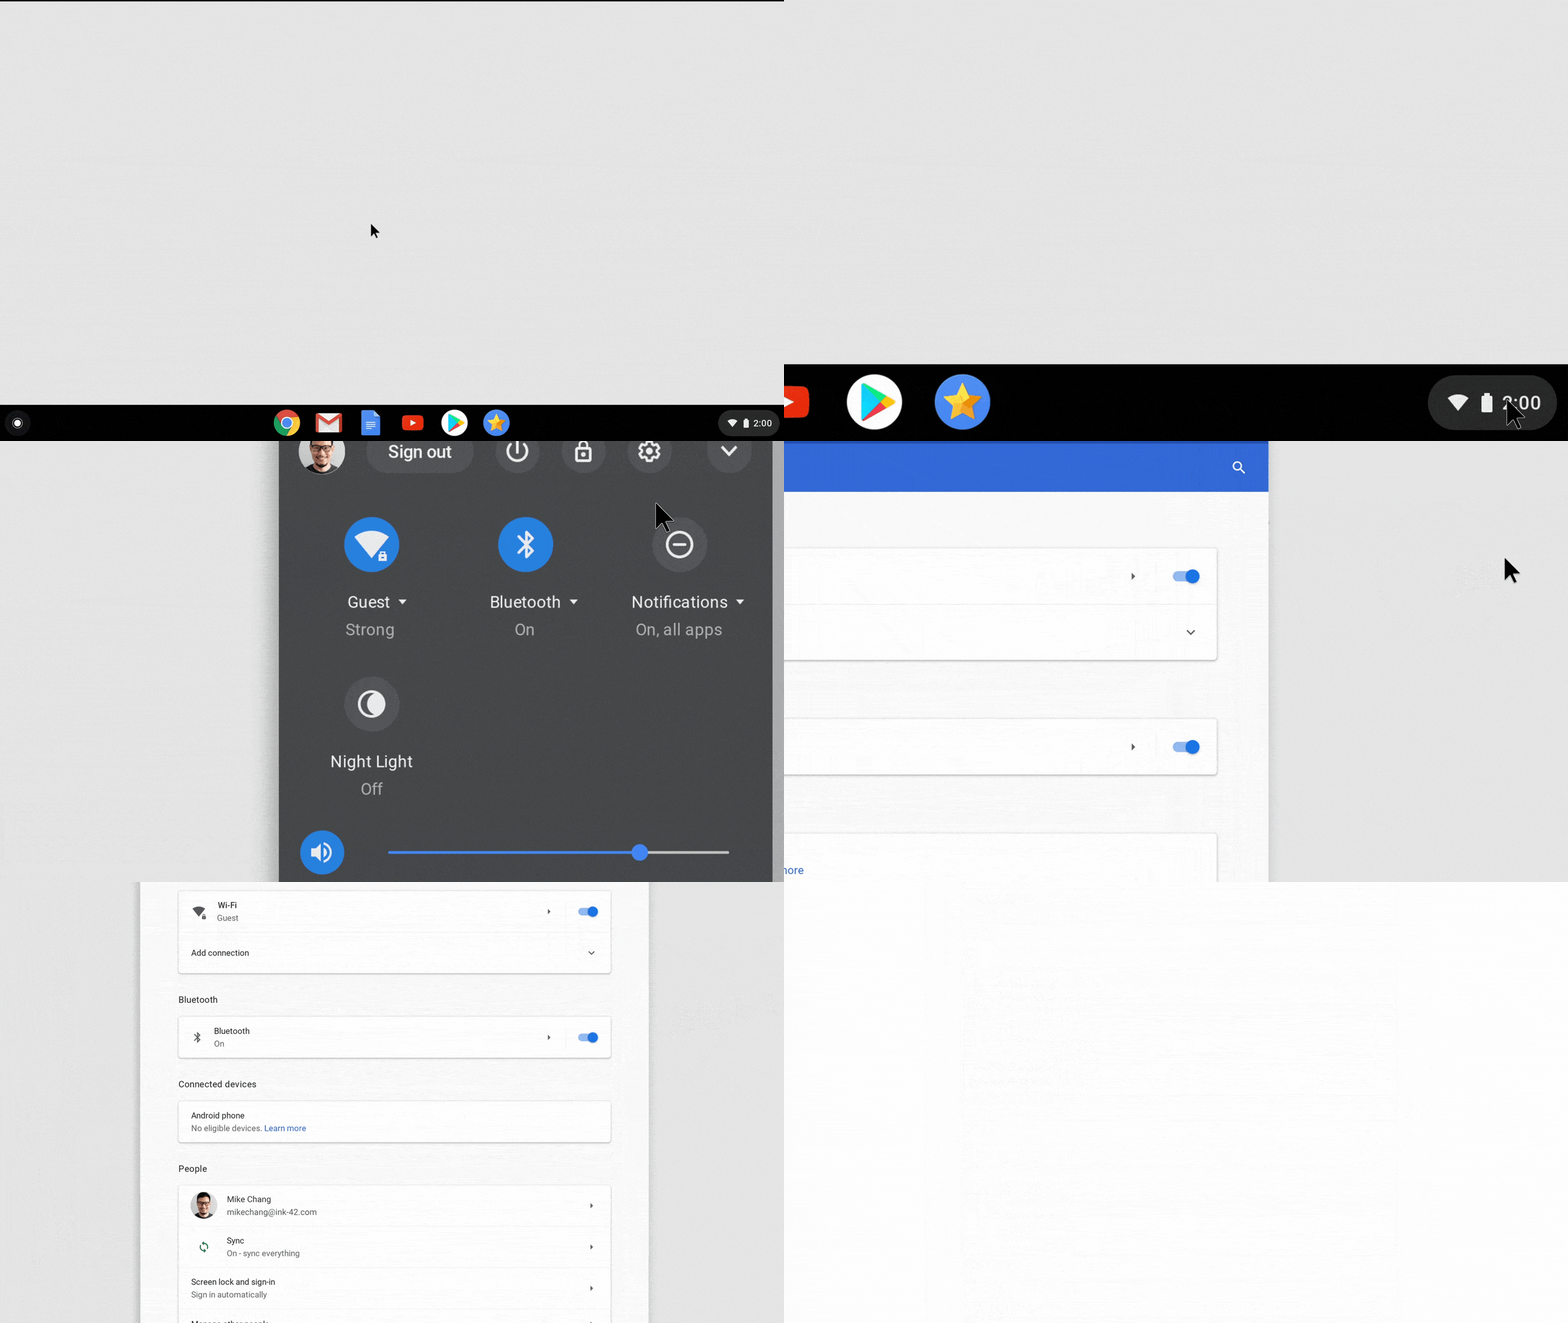
For users familiar with a PC, the control panel is the place where you access settings like screen resolution, keyboard preferences, and privacy and security. On a Chromebook, you’ll find all of these options in Settings, which can be accessed in the bottom right of your screen.
- Click the time in the bottom right corner of your screen. It will pull up different tools for you to use.
- Click the gear/settings icon in the top right.
- Scroll down to the setting options that interest you and make sure they match your needs.

Note: clicking “Advanced” at the bottom will get you even more options for settings. You can also enter keywords in the search bar to locate a specific setting.
4. How do I set up right-click?
Right-click works a little differently on a Chromebook than on a PC (where you typically hit Shift + F10). You can either press the touchpad with two fingers to open the right-click menu, or you can click “Alt” and use just one finger on the touchpad. Once you do, you can scroll, moving left and right to move horizontally or up and down to move vertically. You can also switch your scroll direction. This article explains how, along with other helpful touchscreen tips.
Resources for IT admins to help users
If you’re an IT admin, use these tips to help former PC users adjust to Chromebooks, or keep an eye out for more advice you can share—we’ll link new posts here as we publish them.
For former Mac users: “6 common questions (and answers) for new Chromebook users”


