The content below is taken from the original ( How to Install Windows Server 2022 Step by Step), to continue reading please visit the site. Remember to respect the Author & Copyright.
What Is Windows Server 2022?
Windows Server 2022 is Microsoft’s latest version of Windows Server in the Long-Term Servicing Channel (LTSC). They release new versions on this channel about every three years or so.
The most recent version before Windows Server 2022 was Windows Server 2019. These releases receive ten full years of technical support from Microsoft via Mainstream support (through 10/13/2026) and Extended support (through 10/14/2031).
Over the past few years, the Windows Server team released Windows Server Core releases with breaking new features – these were from the Semi-Annual Channel (SAC). The last release was Windows Server, version 20H2.
These releases are supported for 18 months. So, after August 9th of this year (2022), Microsoft will no longer offer any support for the Semi-Annual Channel of Windows Server.
What are the new features in Windows Server 2022?
Windows Server 2022 is built on the strong foundation of Windows Server 2019 and brings several innovations around three pillars: security, Azure hybrid integration and management, and application platform enhancements. Let’s go through some of the more substantial areas of improvement and innovation.
Secured-core server
A Secured-core server uses firmware, hardware, and driver capabilities to enable advanced security features for Windows Server. The overall design goal is to provide additional security protections that are useful against sophisticated and coordinated attacks.
Transport: HTTPS and TLS 1.3 enabled by default
Secure connections are at the heart of today’s systems on your network and the Internet. Transport Layer Security (TLS) 1.3 is the latest and most secure version of the Internet’s most deployed security protocol.
With HTTPS and TLS 1.3 enabled by default, protecting the data of clients connecting to the server is more streamlined and inherently automatic. To learn more about verifying your applications and services are ready for TLS 1.3, please visit Microsoft’s Security Blog.
Azure Arc enabled Windows Servers
Azure Arc enabled servers with Windows Server 2022 bring on-premises and multi-cloud Windows servers to Azure. The management experience is designed to be consistent whether you’re managing Azure virtual machines or hybrid Windows Server 2022 in your datacenters.
Application platform
There are many platform improvements for Windows Containers. The most impactful enhancements include application compatibility and the Windows Container experience with Kubernetes.
A welcome optimization effort was undertaken and now affords IT Pros a 30% faster startup time and better performance thanks to Microsoft engineers reducing the footprint by up to 40%.
You can now run applications that depend on Azure Active Directory with group Managed Services Accounts (gMSA) without domain joining the container host. In addition, Windows Containers now support Microsoft Distributed Transaction Control (MSDTC) and Microsoft Message Queuing (MSMQ).
Kubernetes also receives some welcome enhancements, including support for host-process containers for node configuration, IPv6, and consistent network policy implementation with Calico.
Microsoft Edge
For the first time in a long time, Internet Explorer is being replaced with Microsoft Edge as the default browser in Windows Server! However, the Internet Explorer application is still included for legacy compatibility.
Prerequisites
Hardware requirements
Because of the highly diverse scope of potential deployments of Windows Server, these guidelines should be considered when planning for your installations and scenarios for Windows Server 2022. These are most pertinent for installing on a physical host or a physical server. These generally include both the Server Core and Server with Desktop Experience installation options.
- Processor
- 1.4 GHz 64-bit processor
- Compatible with x64 instruction set
- Supports NX and DEP
- Supports CMPXCHG16b, LAHF/SAHF, and PrefetchW
- Supports Second Level Address Translation (EPT or NPT)
- Memory (RAM)
- 512 MB (2 GB for Server with Desktop Experience)
- ECC (Error Correcting Code) or similar technology for physical deployments
- Storage Controller and Disk Space
- PCI Express architecture specification storage controller
- 32 GB disk space (minimum for Server Core and IIS Role installed)
- Network requirements (adapter)
- Ethernet adapter capable of at least 1 Gbps throughput
- PCI Express architecture
- Other requirements
- DVD Drive (if you intend to install Windows using DVD media)
- UEFI 2.3.1c-based system and firmware to support Secure Boot
- Trusted Platform Module (TPM)
- Graphics device and monitor capable of Super VGA (1024×768) or higher resolution
- Keyboard, Mouse, Internet Access
Installation options
There are two installation options for Windows Server 2022 – Server Core installation (recommended by Microsoft) and Server with Desktop Experience. Let’s go through the basics and pros/cons of each.
Server with Desktop Experience vs. Server Core
For the past 30 years or so, versions of Windows Server were installed with a GUI (Graphical User Interface), now called the Desktop Experience. Starting with Windows Server 2008, Microsoft added a new ‘Server Core’ option that removes the GUI/Desktop environment from the installation and saves disk space, memory usage, security attack footprint, among other enhancements.
Their design goals were to give you a leaner Windows Server footprint, and have you manage it remotely. Efficiency and Security are the primary pros.
The main con to the Server Core option is the ease of manageability, but only at first. You can’t use Remote Desktop Protocol (RDP) to login to the server, install a server role or feature, or run Windows Update from the Control Panel.
However, as you migrate your ‘server management’ methodology to how Microsoft recommends it, you’ll probably find it actually works out better in terms of efficiency and ease of use. You can use Windows Admin Center to install roles and features, check how much disk space is free on your C: drive, and even check for Updates, install them, and schedule the reboot!
You can check out our separate guide on how to install Windows Server 2022 Core.
How to get installation media
There are several methods to download Windows Server and obtain the ISO file/installation media for Windows Server 2022:
- You can browse your Visual Studio Subscriber Downloads (formerly MSDN Subscriber Downloads) website and download it there.
- You can also browse the Volume Licensing Service Center (VLSC) or, more recently, the Microsoft 365 admin center. Navigate to Billing -> Licenses and, if you have permissions, you should see a ‘Volume License’ tab across the top to find the download.
- If you’d like to download a 180-day evaluation ISO, you can browse the Microsoft Evaluation Center here.
Installing Windows Server 2022
OK, enough of my yakking… let’s boogie!
I wrote a series of articles in the summer of 2021 around upgrading my Hyper-V lab of Active Directory to Windows Server 2022. For this article, I have created a new Hyper-V virtual machine and will use this Windows Server VM to install Windows Server 2022.
After configuring the VM with my installation ISO, I started the VM and pressed a key to boot from the ISO.
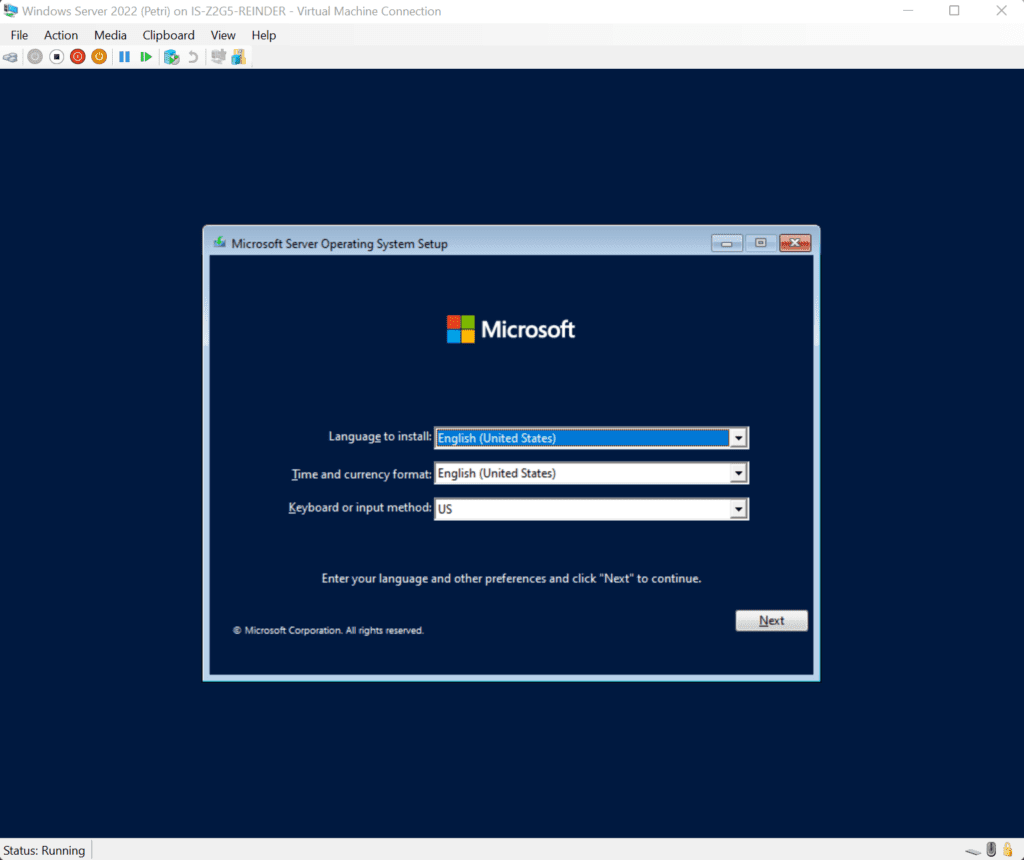
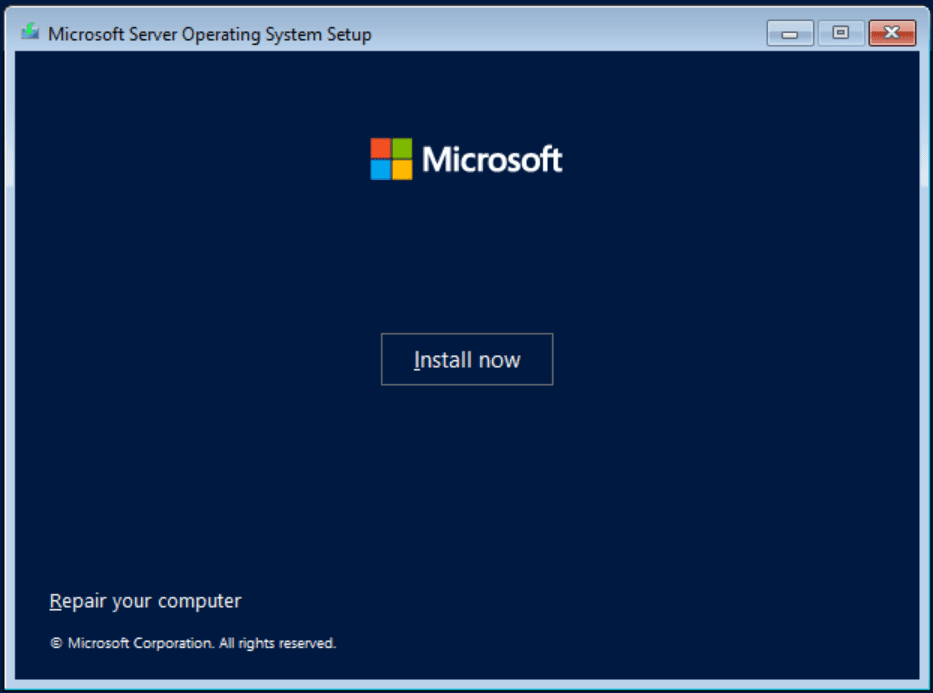
Here, I click Next. And then Install now. (Notice the title bar – instead of saying Windows Server 2016 or Windows Server 2019, it now says ‘Microsoft Server Operating System Setup’).
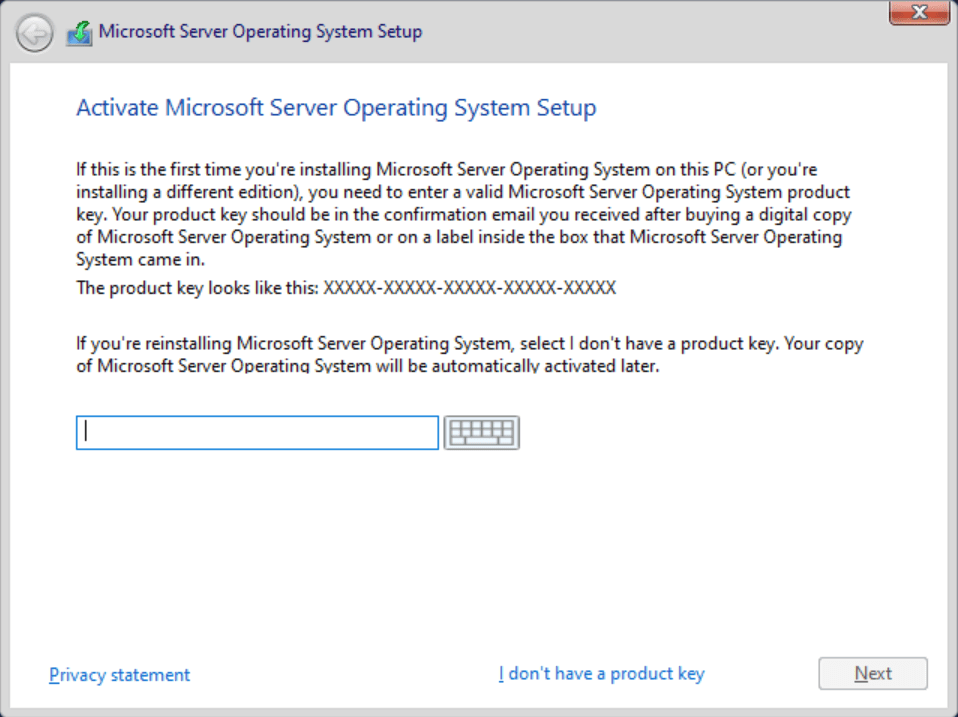
Here, you can optionally enter your product key. This could be a retail key, a Volume License Key (VLK) from your organization, or an evaluation key. Note – You don’t have to enter one now… just click ‘I don’t have a product key’ if you want to handle this post-setup.
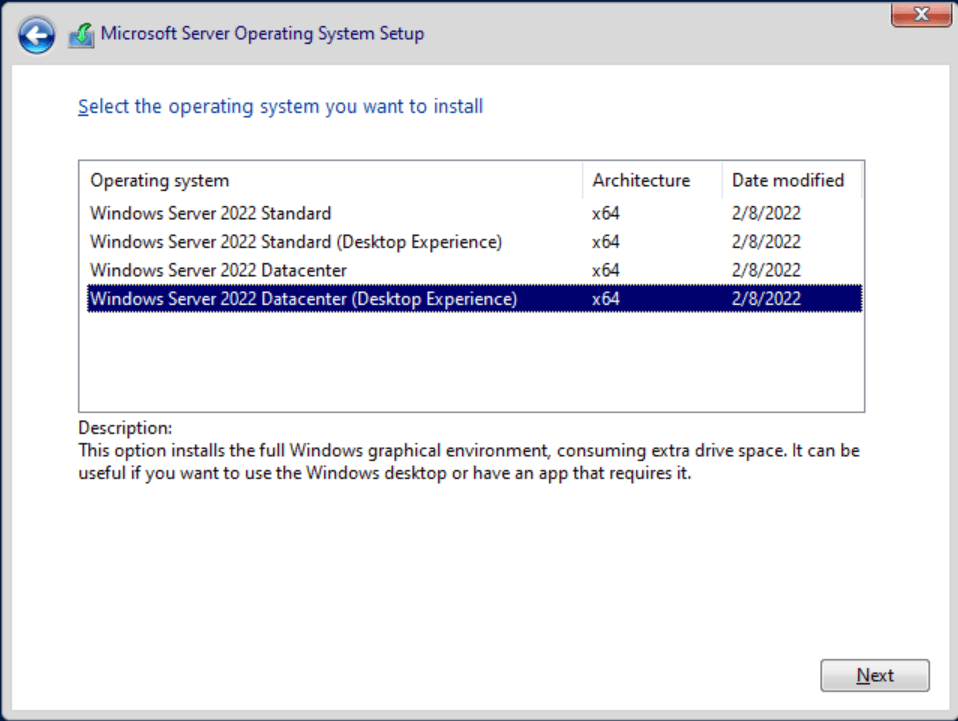
Here, depending on what installation ISO you obtained, you’ll choose your product edition and the installation type. Here, I will choose ‘Windows Server 2022 Datacenter (Desktop Experience).
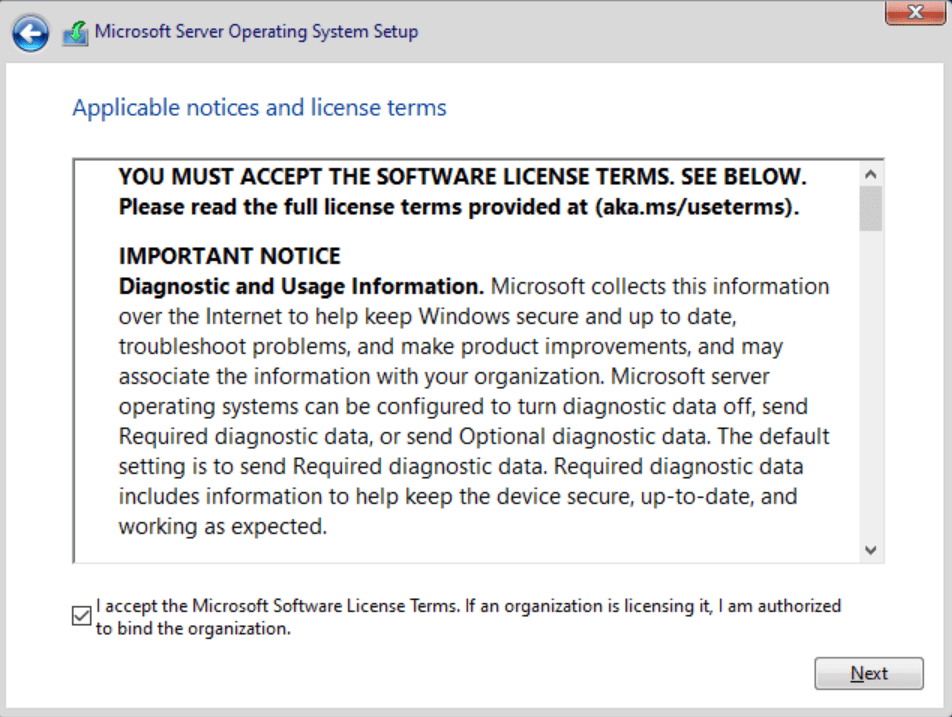
Check the box to accept the license terms and click Next.

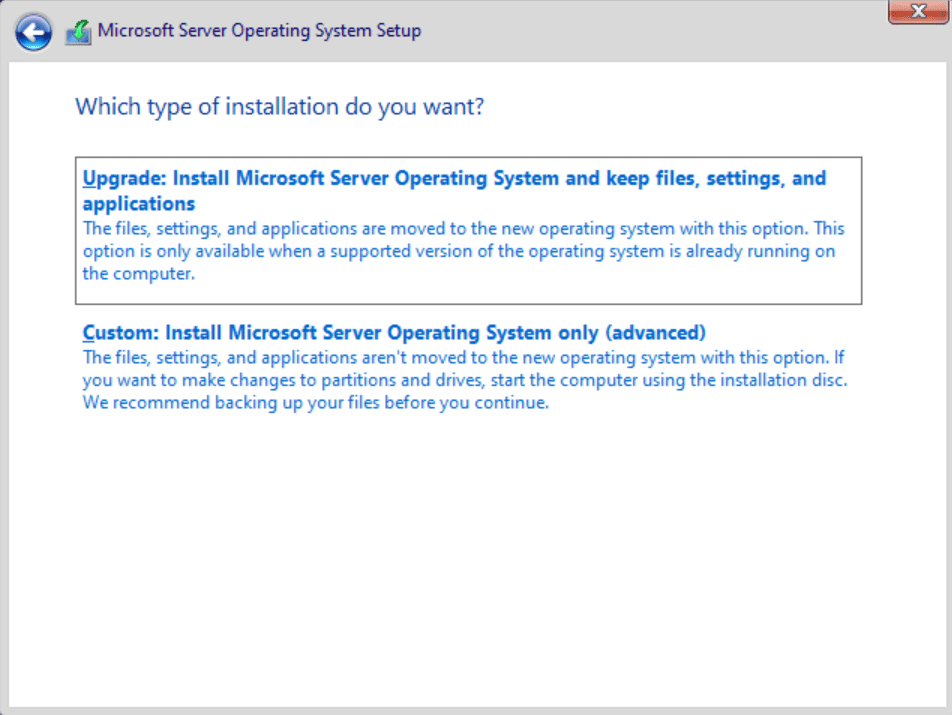
Next, for what type of installation to choose, we’ll go with ‘Custom‘ as we are doing a clean installation with no existing operating system.
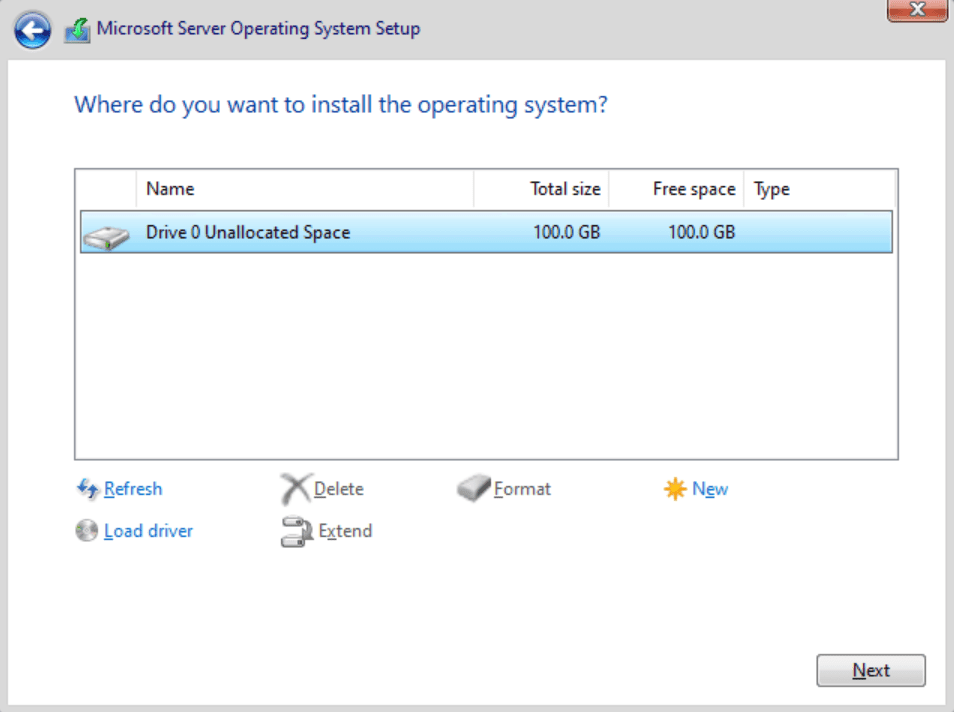
You’ll have a single, unallocated partition when doing a clean install, so click Next.
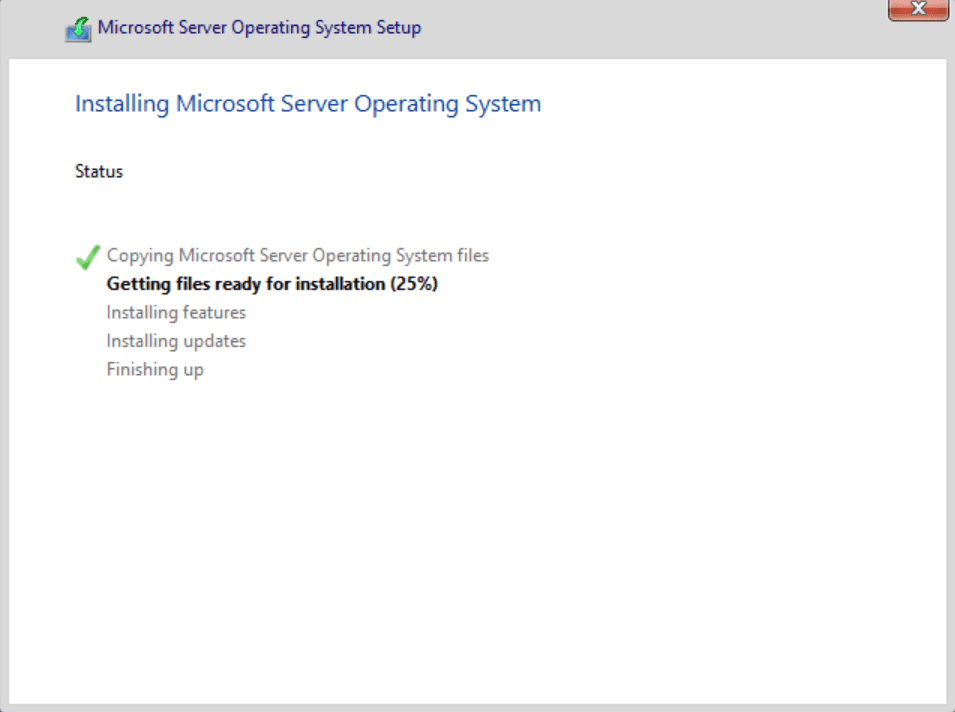
Now, Setup will copy all the installation files, unpack the image, detect devices, and bring you to your first post-setup task.
Post-setup tasks
The first step is to create the local Administrator password. Out of the box, this will require a complex password, so make sure it’s difficult enough to crack.
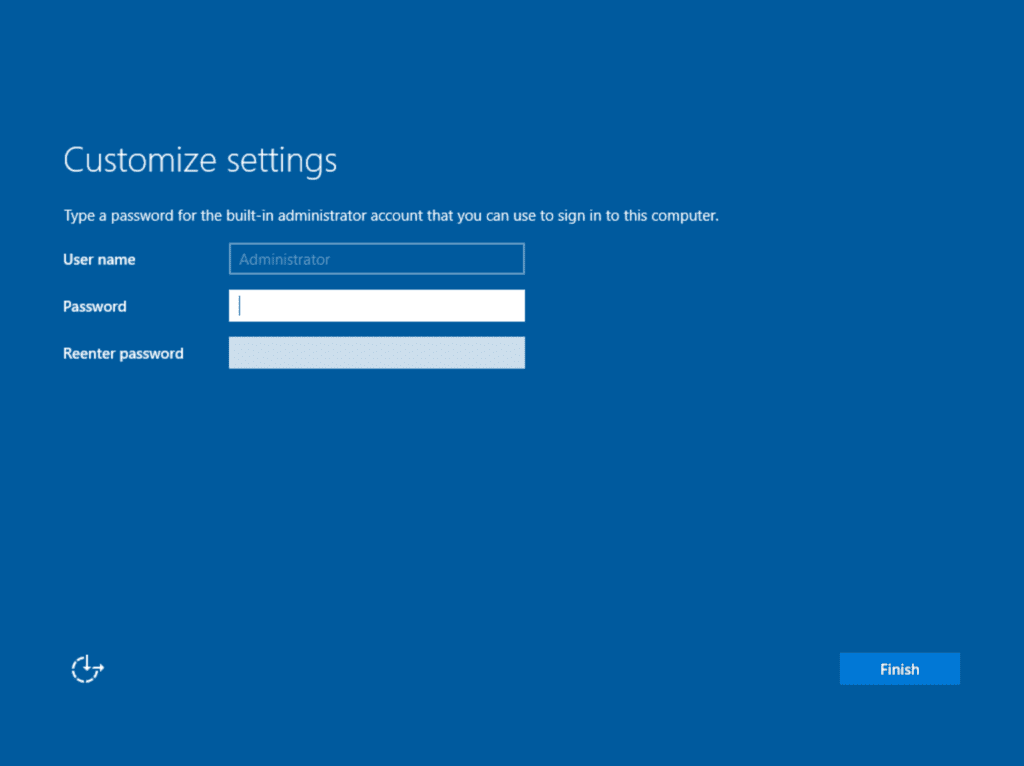
Then, press Ctrl-Alt-Del, or your virtual equivalent, and log in.

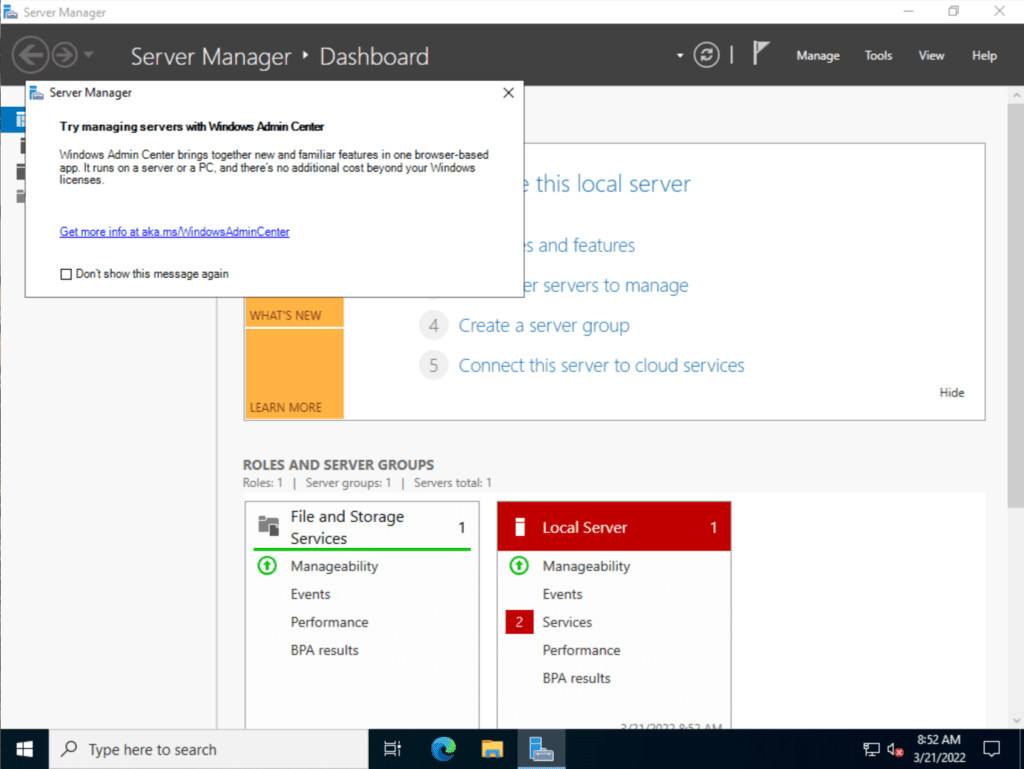
You will notice that Server Manager launches automatically and reminds you to use Windows Admin Center to manage the server.
See? Microsoft recommends you use the Server Core option so you’re not logging into your servers needlessly. If you won’t do that, though, they will at least ask you to use Windows Admin Center to manage the server remotely. Yes, they are persistent…
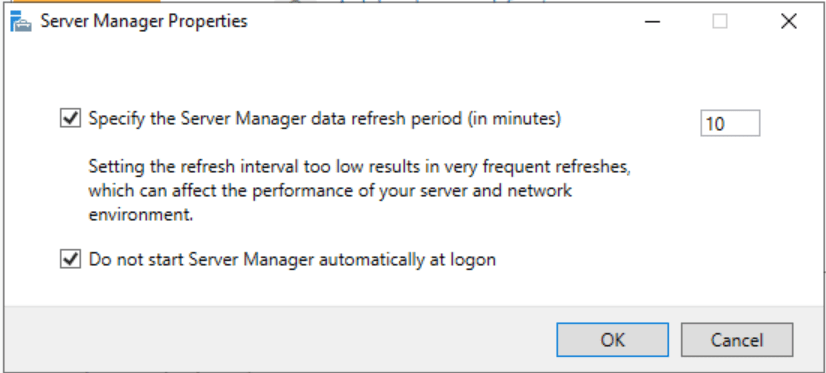
Quick Tip – If you don’t want Server Manager to launch upon login, click the Manage menu in the upper right corner, then click Server Manager Properties. Next, check the box ‘Do not start Server Manager automatically at logon‘.
How to configure your network
There are quite a few post-setup tasks to perform, but because our environments are so diverse, it’s best to stick to the core tasks that are the most crucial to get your server on your network as soon as possible.
First, the network: It is highly likely that you will be setting a static IP address for your server. To perform this setup, in the Server Manager, click the ‘Configure this local server‘ link at the top.
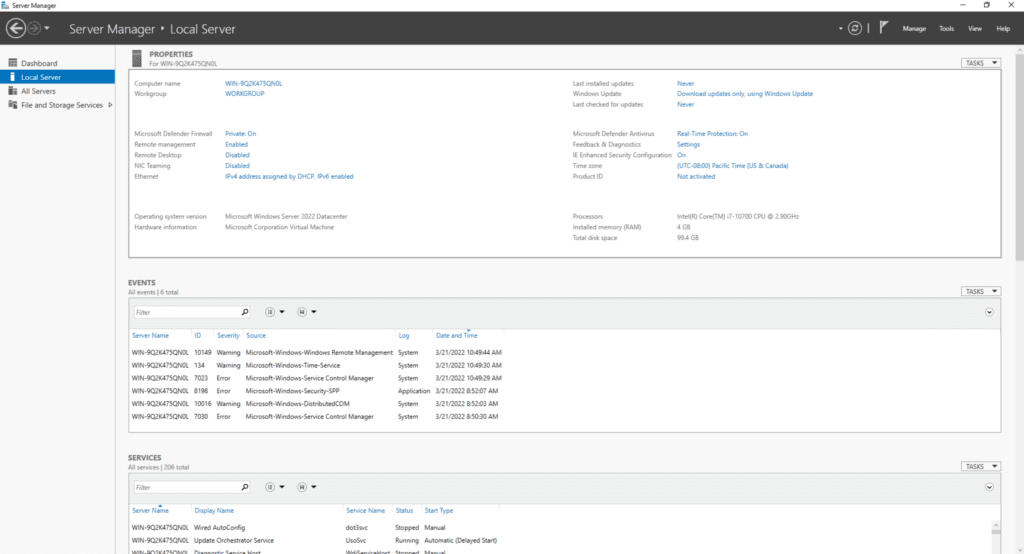
Then, click the hyperlink next to your Ethernet adapter (You may very well have more than one).
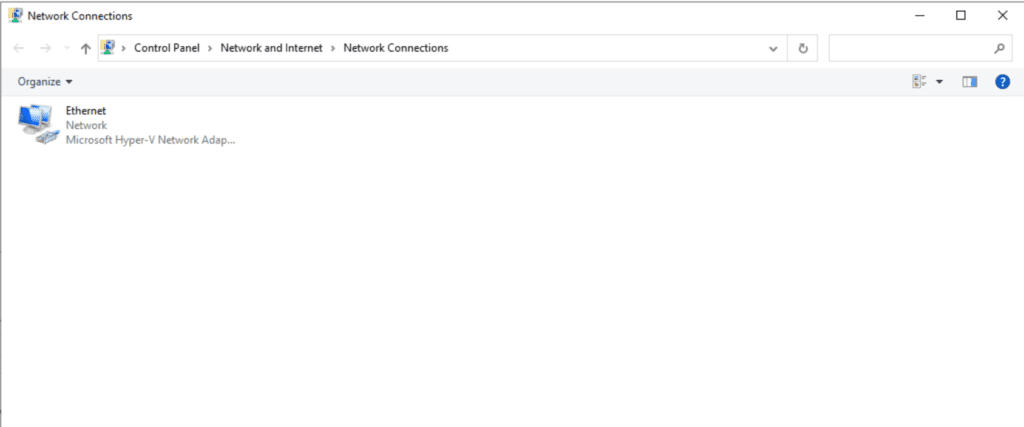
Right-click on the adapter and click Properties.
Now, click on ‘Internet Protocol Version 4 (TCP/IPv4)’ and click Properties.
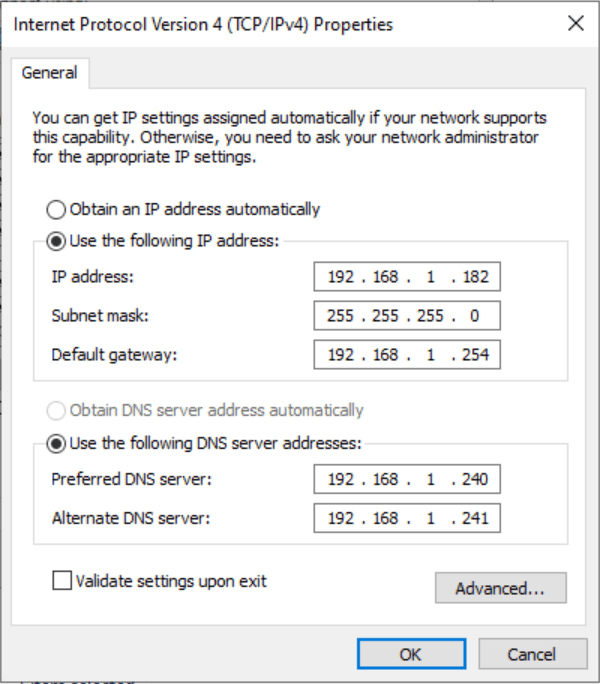
Go ahead and click ‘Use the following IP address‘ and enter your pertinent information. You and/or your network team or virtualization team should have the appropriate information to enter here.
Click OK and be sure to test and validate network and Internet access (if that is your design intent) before proceeding.
How to install the latest Windows Server updates
Before putting your new server into testing and/or production, you’ll want to run Windows Update to get the latest security fixes, bug fixes, and any new features.
To do this, back in Server Manager, you can click the hyperlinks in the upper right corner that describe ‘Last installed updates‘, ‘Windows Update‘. This will open the Settings -> Windows Update menu.
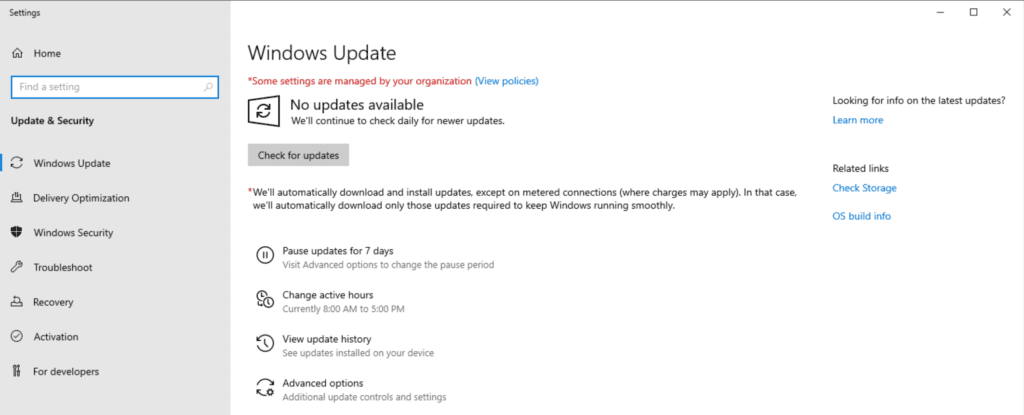
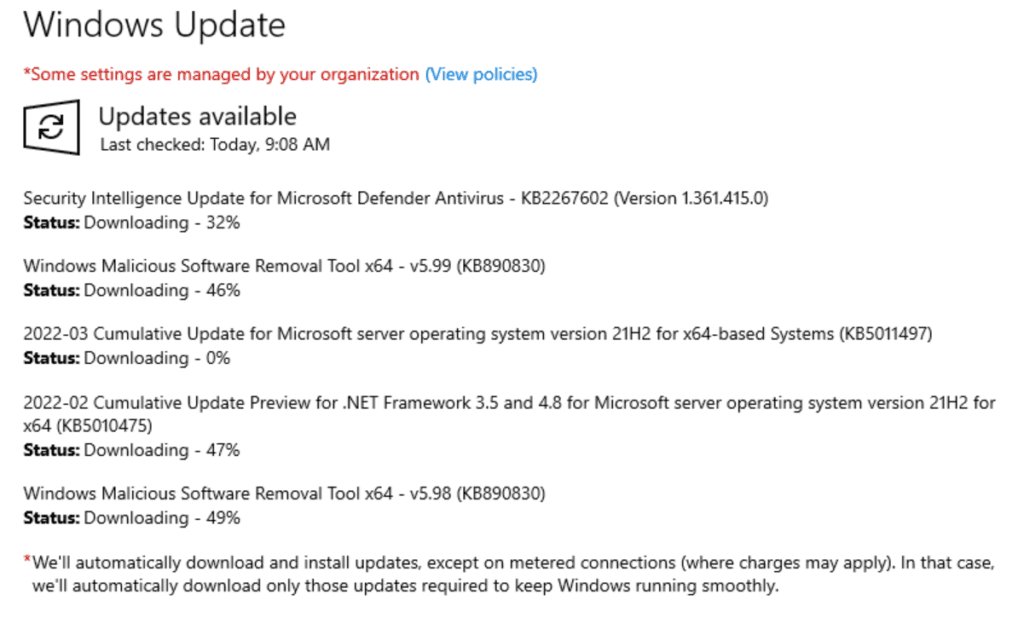
Click ‘Check for updates’ and you’ll get the latest cumulative updates for Windows Server, .NET Framework, etc.
After Windows Update prompts you to reboot, go ahead and reboot. Then, for good measure, open Windows Update again, click Check for Updates, just in case there are any more missed during the first run.
Conclusion
You should now be educated and ready to start installing Windows Server 2022 in a test environment to begin validating your applications and services and see how they work on Windows Server 2022.
If you need more information about Windows Server 2022, Microsoft provides a lot of helpful and solid resources about the latest version of its Server OS. I recommend you to start on the Windows Server Documentation website.


